December 21, 2011

One Row Lace Scarf (Knitting)

Knitting + me = LOVE.


I mean, doesn't that just look relaxing?  Rainy day, knitting, drinking tea by the window?

I really am enjoying it.  But I am SOOOOO slow.  Uber-slow.  This 'quick and easy' scarf probably took me a good 30 hours, anyway.


This is the One Row Lace Scarf.  I do like the pattern, and appreciated how easy it was to put together, even if it did take me forever!

Even the ends turned out pretty even...

And there's only one mistake in the whole thing (that I could see).  Don't ask me how this happened, but here it is.  I tried to circle this big stitch in red so you could see it...


And off it went to my Mother-In-Law for Christmas.

December 18, 2011

Creepy Little Owl


Lesson learned when sewing up a 2 inch sized owl....SEW BY HAND.  For some strange reason, my 4 year old absolutely loves this little guy.  Hey, at least he didn't go to waste!

I used this pattern from homemade by jill, not that I did it any credit.  Sometime I will try it again by hand.  So that it looks cute, not creepy.

December 15, 2011

Mrs. Claus Costume

Oh boy, I am so excited about this one!  Photo credits to my 4 year old...

The apron has a LOOOOONG tie on the back...

So what is it with the Santa/Mrs Claus costumes that make Mrs Claus all slutty?  Really?  Maybe for a college party....but out here with the little people....no thank you.

I used Simplicity 3723 for the basic shape of the dress and bonnet, and just winged a basic apron.  Best part?  I put in a pocket under the apron for little candy cane goodies!  Now I'm all ready for the preschool sing-a-long!

December 13, 2011

A bag for Miss Mady

I love kids' birthdays.  So much fun to sew something special!  This little birthday girl loves Mickey Mouse Clubhouse so I sewed her up a bag.  Hopefully I'll have time to make something to put IN the bag, but that completely depends on what else I get done this week.  Christmas is coming!


I really do love applique.


December 6, 2011

Rag Doily Rug

I did it!


The Rag Doily Rug....my very first ever real knitted pattern!  I bet you can tell which side I started on...


Haha!  <sigh>  Oh well.  I actually started this thing 4 or 5 times.  This is the first time I have ever knitted anything other than my scarf, which was a straight knit stitch the whole way.  I'm pretty proud, actually.  Plus I love that the pattern uses slit sheets.  Fabric!  Yay!


November 30, 2011

Hat and Scarf (18" doll)

A few more things for the 18" doll this Christmas.  Again, from the McCall's 3469 pattern, the hat and scarf combo...


I'm loving all that soft red fluffy fabric.  Shockingly easy to work with!

I do wish the hat was tighter, but I'm not taking out the lining just to tighten the elastic.  Lesson learned for next time -> check that before finishing the hat.  Ah well.


November 27, 2011

Baby Backpack (18" doll)

Baby Doll A has a sweet new ride...

This is one of the Christmas gifts I'm making for Miss A's 18" doll this Christmas.  It's a backpack for my little lady, that also carries her baby doll.  Imagine my delight when I saw that someone on Etsy was selling the pattern for only $6! 


I mean, who wants to figure out the measurements of the backpack, really?  For $6, I figured it was worth it.  Until it DIDN'T WORK.  Man was I peeved.  All I can figure is that I printed the pattern off wrong (not that there were any instructions about that).  But between that and the fact that the bag wasn't lined (and a few other minor problems), I was pretty frustrated.  It would have been easier if I'd have figured it out myself.  To be fair, I contacted the seller and she is refunding my money.  She also said that she's had tons of other people put the pattern together with no difficulty.  I find that a little hard to believe, because really, if an engineer (who sews all the time) can't follow your pattern easily and make it work.....I'm not sure who can.  PLUS, UNLINED?  Really?  On a backpack (with interfacing!) for a kid?  Not happy about it.

Once I realized where the project was headed, I did put in a quick-fix lining myself...


And added a little pocket on the inside.  I intended to add a little handle at the top back of the bag for easy carrying, but I was so irritated by the time I sewed it all together that I completely forgot!

In the end I wish I'd have done it myself.  It would have been easier, and I would have liked the finished result better.  I'll redesign it if I ever make another one from this 'pattern'.

November 22, 2011

Fabric paper dolls

I made up a few sets of these "flats" (aka flat fabric dolls) last holiday season.  Gotta love the Moda Bake Shop for all their fun free patterns!  This is a great way to use up a bunch of scraps.


All the little changes of clothes are just velcro'd on!  Genius?  Definitely!


November 15, 2011

Doll Purse

A few weeks ago JoAnn's had their McCall's patterns on sale for $1.49 each!  I love when they do that....I go through their drawers and pick out as many as they will let me have.  Since I had Miss A with me, I let her choose a pattern for her 18 inch doll.  She chose McCall's 3469.


She really wants to sew.  Unfortunately I find that I lack the necessary patience to help my 4 year old through an entire project.  I do well in 30 minute spurts though.  So here we are, with our version of the purse, fabrics chosen by Little A and the flower made entirely by her....


We were supposed to add a snap - but really, I didn't have a snap, and isn't Velcro a lot easier for little fingers anyhow?  We went the Velcro route.

November 9, 2011

Capes, capes, and more capes

A few more capes for an upcoming birthday! 


The pink sparkley one has a surprise on the other side....

Plus, you know you can always jump better in a cape, right?


November 8, 2011

Over the Top Bag

Last Christmas I started making bags.  I thought I'd share one I made for a young cousin of mine!


The fabrics were a little funky, which I liked.  Hopefully she did too!  It was my first time installing a snap, but turns out they are SIMPLE. 

The pattern is free from allpeoplequilt.com, and is called the Over the Top Bag.  You can find it here.

If you try it, please read the instructions on the pattern pages, which tell you to set the Page Scaling preference to NONE.  I didn't, so I had to fudge some of the bag pieces when putting it together.  Woops.

November 2, 2011

Silhouettes

Want a great idea for Christmas gifts for the grandparents?  Silhouettes


As soon as I saw this idea I knew I had to try it.  Turned out to be easy and quick....and rediculously cute!  Both sets of grandparents ended up with a set last Christmas, and I made an extra set for me.


The one thing I will say is to make sure your Exacto knife is very, very sharp.  Very sharp.


October 31, 2011

Halloween Footprints

Happy Halloween!


Have you seen all the handprint and footprint art ideas out there?  I loved this one!  I wrote out the letters with a silver sharpee though.  Easy way out?  Maybe.  But fast, and just as cute.

October 28, 2011

Jake and the Neverland Pirates costume tutorial

Of all the possibilities in all the world, my son wanted to be Jake from Jake and the Neverland Pirates for Halloween this year.  We do love Jake and the Neverland Pirates in our house.  So I got a-sewin’.  Turned out pretty cute!


A great thing about Jake is that his outfit is supposed to be a bit ‘scrappy’…..so I didn’t bother finishing off any of the raw edges.  I simply zig-zag stitched everything (I’ll spare you from writing that in basically every line of the instructions).  Adds to the Jake allure, in my opinion!

You could certainly add Jake’s boots and a sword, but since there’s no way my 2 year old is going to wear them, I’m not making them this year.  Maybe someday I’ll do those as well and update the tutorial.  Time will tell.

If you would like an easily printable version of this tutorial, one can be found at:
http://www.scribd.com/doc/70680698/Jake-and-the-Neverland-Pirates-Costume-Tutorial-Public

Here’s the basic how-to:

Shirt:

- Make a pattern from a t-shirt for the shirt body (cut on a fold at the left side) as well as the sleeve (cut on a fold at the top).


- Cut out white fabric for Jake’s shirt and sleeves.  Cut off the bottom 4 inches of the white shirt in prep for the next step.

- Cut two 4 inch rectangles of black fabric to use as the bottom of Jake’s shirt.  Cut the 4 inch rectangles the length of the bottom of the shirt front (or back). 

- Right sides together, sew one of the black rectangles to the front shirt piece and the other rectangle to the back shirt piece. Iron the seam flat.

- Right sides together, sew the shirt front to the shirt back at the shoulder seams. 

- Right sides together, sew the shirt at the side seams.

- Cut a v-shaped notch in the neckline at the front of the shirt.

- Sew the underarm seam of the sleeve. 

- Cut a v-shaped notch on the front side of each sleeve.

- Matching underarm seams, pin the sleeve to the shirt right sides together, and sew sleeve into the shirt.

- Using a piece of black string or yarn, sew the ‘x’ detail to the front v-shaped notch on Jake’s shirt.

Admire your handiwork!  You’re halfway done!

Vest:

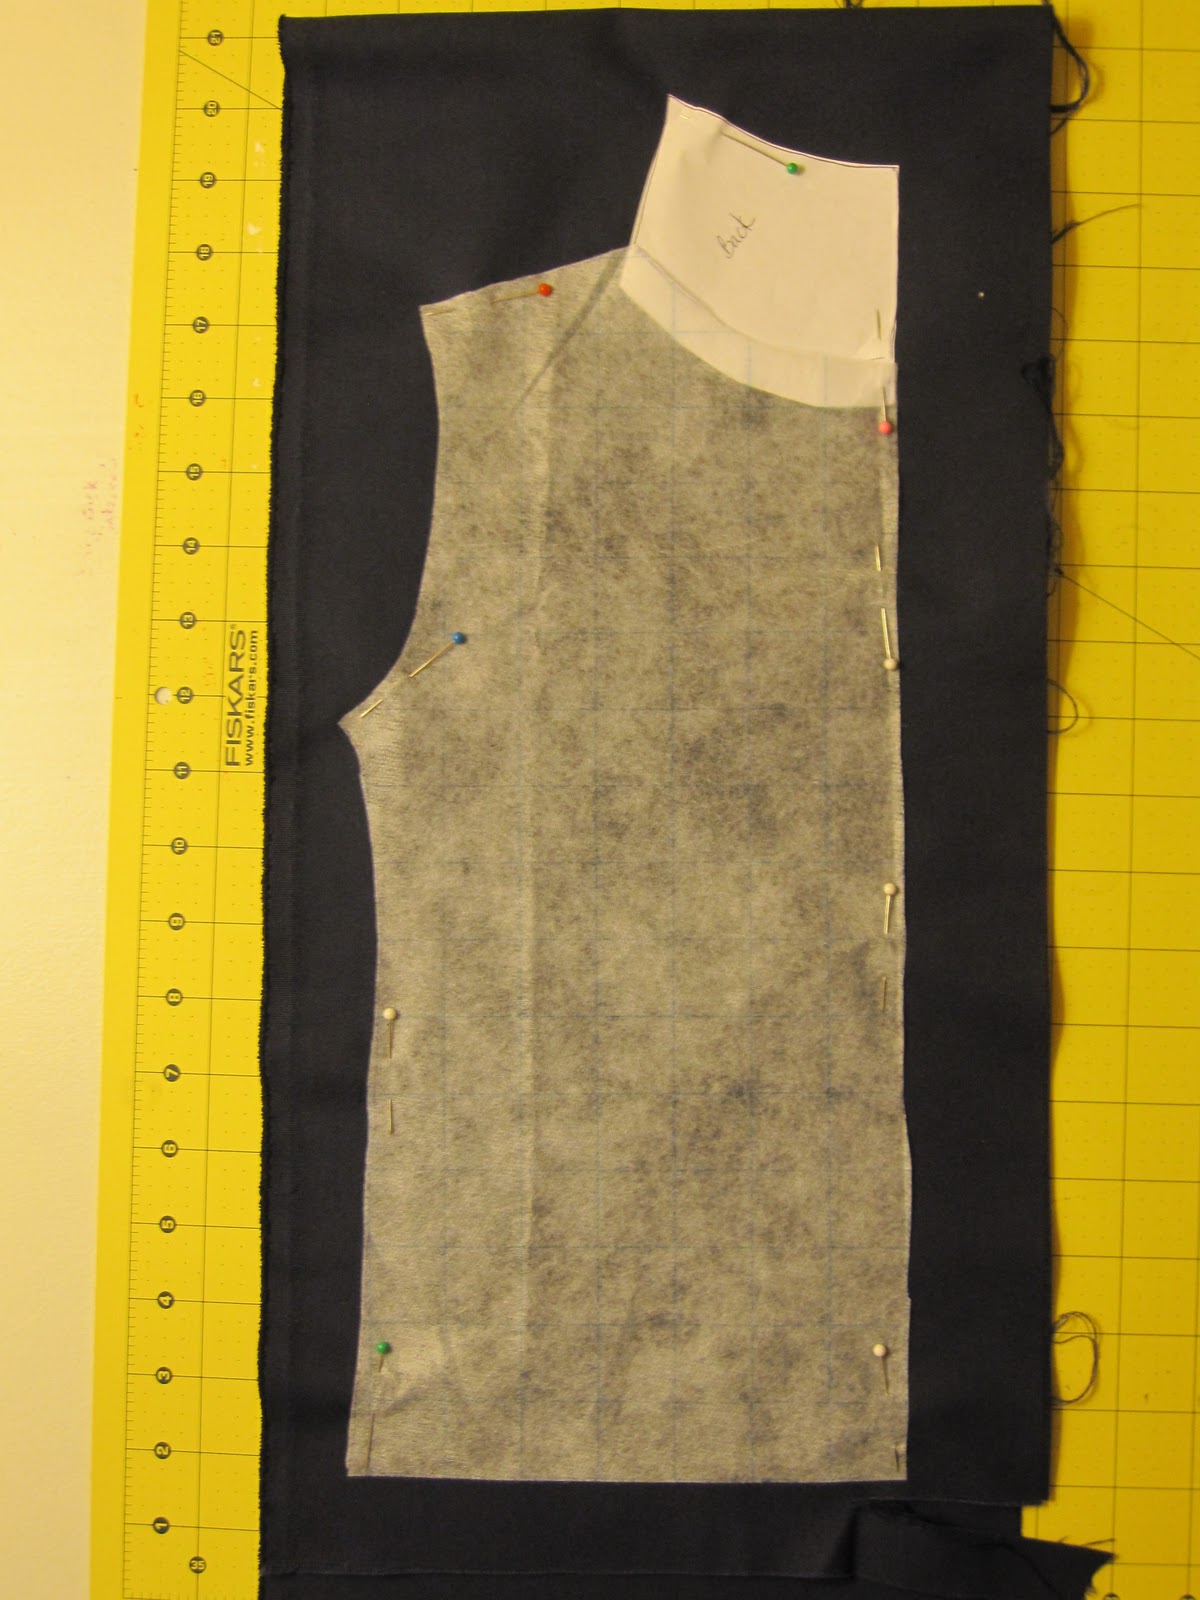
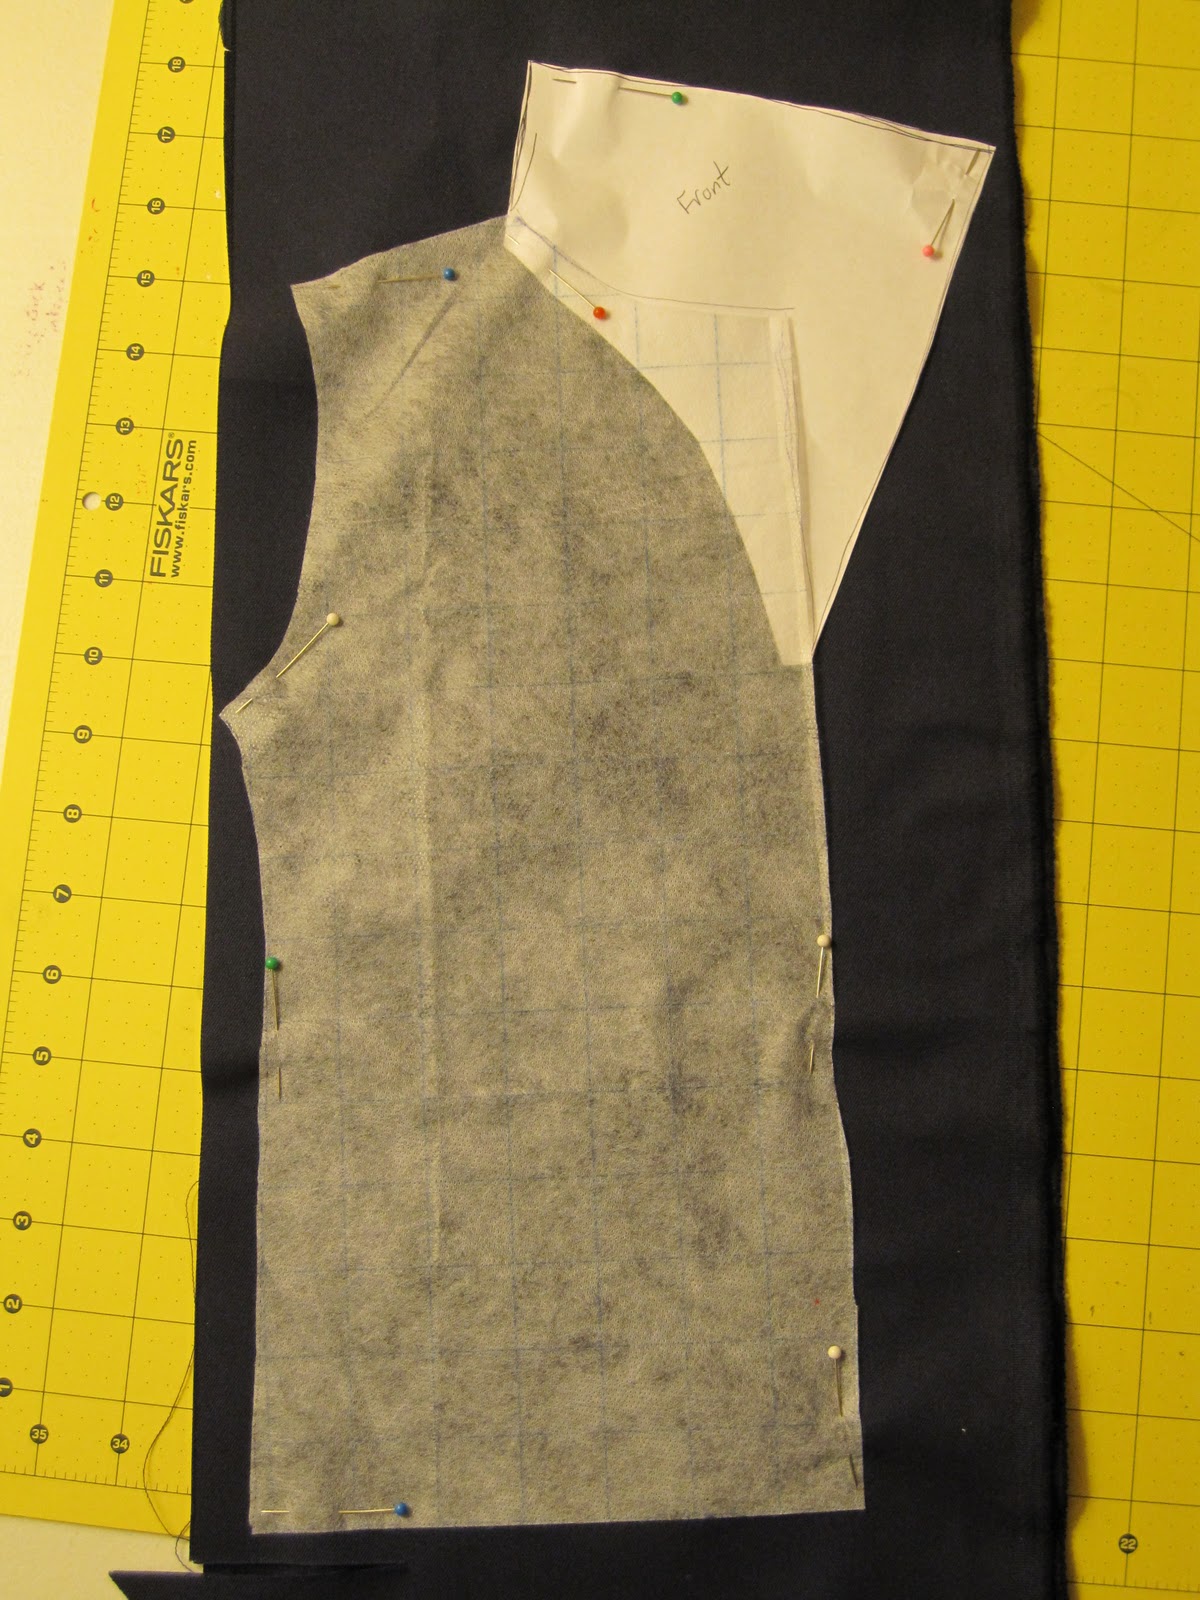
- Using the pattern you created for Jake’s shirt, add a collar (for the back) and a collar with extension (for the front).


- Cut the back piece on a fold, but remember you will need TWO separate front pieces since Jake’s vest is open at the front!

- Right sides together, sew one front piece to the back piece at the side seam and the shoulder (from the top of the arm hole to the tip of the collar).  Repeat with the other front piece. 

- Cut a 1-inch strip from yellow fabric for the edging on Jake’s vest.  Since it will need to be long enough to go around the entire edge of the vest, make sure you cut enough length.  I had to sew several strips together to make it long enough.  Zig-zag both edges of the strip and iron in half to create a crease.

- Sew the edging around the entire outside edge of Jake’s vest.  I started at the back middle of the collar – next time I’d probably start at the back middle of the bottom of the vest.


My Jake vest had a seam down the middle of the back…I didn’t have enough navy blue fabric for the entire back, but I made it work!

- Sew four yellow buttons (or sew four yellow circles, if you prefer).

Headband:

- Cut a 3 inch strip of red knit or any stretchy red fabric (I used an old red t-shirt). 

And there you have it! 

If you make a costume, I would LOVE to see it!  Please take a moment to upload photos on my Flickr site:


Please give credit where credit is due.